


How to Calibrate a Press Brake for Precision Bending?
Table of Contents
1. Step 1: Clean the Machine
2. Step 2: Check Hydraulic Oil Level
3. Step 3: Full Machine Inspection
4. Step 4: Machine Parameter Setup
5. Step 5: Test Bending
6. Step 6: Precision Adjustment
7. Step 7: Verification Test
Press brake calibration is critical for achieving consistent bending results. Proper calibration ensures optimal machine performance and precise bends every time.
In metal fabrication, press brakes are essential for sheet metal bending. Their accuracy depends entirely on calibration quality. Press brake calibration involves systematic adjustments to ensure the machine meets exact bending specifications. Regular calibration not only guarantees product quality but also prevents operational errors.
Below is a detailed guide to standard press brake calibration procedures for maximum precision and efficiency.
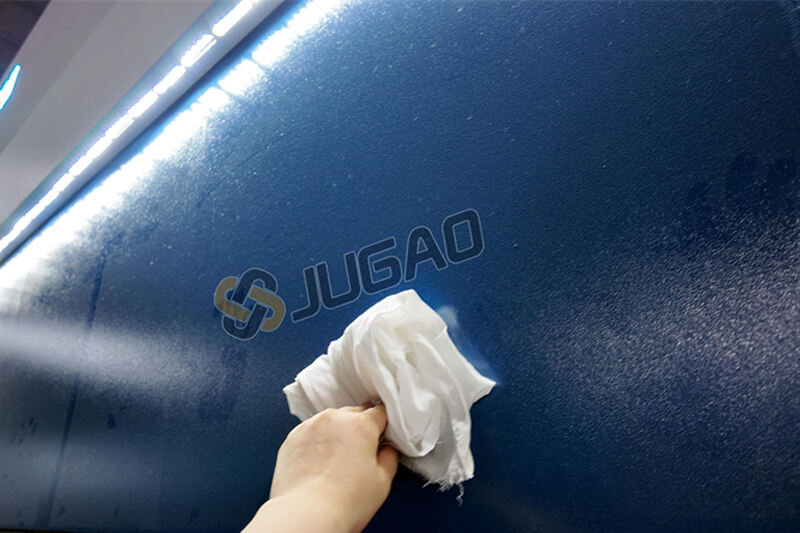
Step 1: Clean the Machine
Thoroughly clean the machine before calibration. Dirt and debris can affect accuracy.
Use a lint-free cloth to wipe down critical components:
○ Machine bed
○ Ram (slide)
○ Backgauge system
Ensure all workpiece-contact surfaces are free of contaminants.

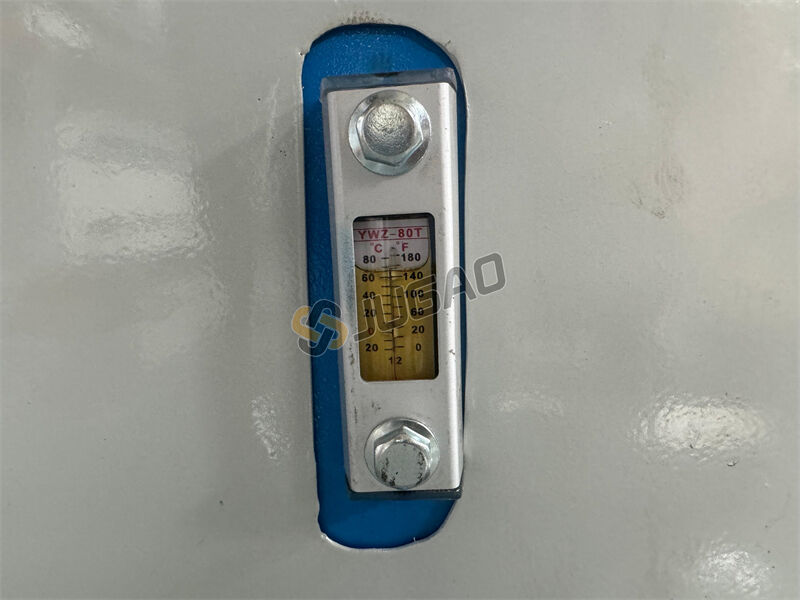
Step 2: Check Hydraulic Oil Level
Inspect the hydraulic oil reservoir:
Low oil levels cause unstable operation and poor bending accuracy.
Check oil levels before each use to ensure proper hydraulic function.
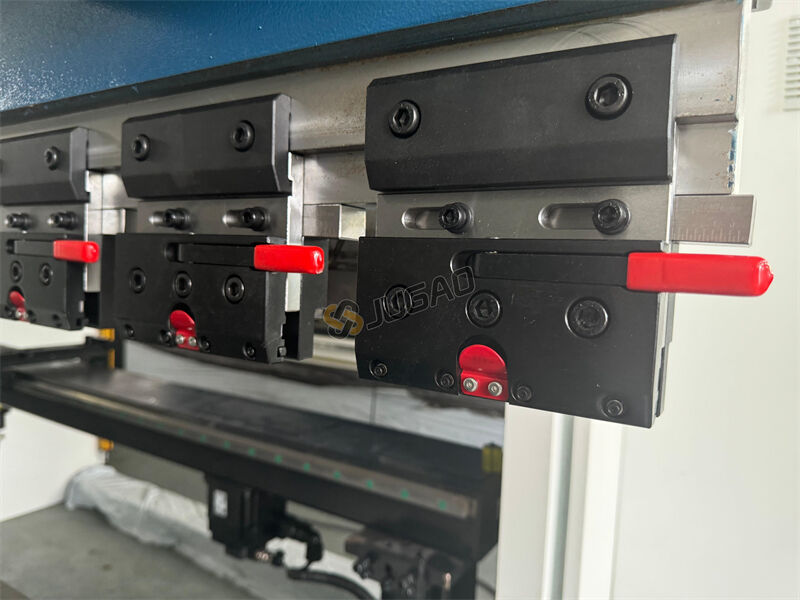
Step 3: Full Machine Inspection
Conduct a comprehensive check of all components:
1. Bed and Ram: Look for wear or deformation.
2. Backgauge: Verify smooth movement.
3. Tooling (Dies/Punches): Check for damage or wear.
Replace any defective parts immediately—they will compromise calibration.
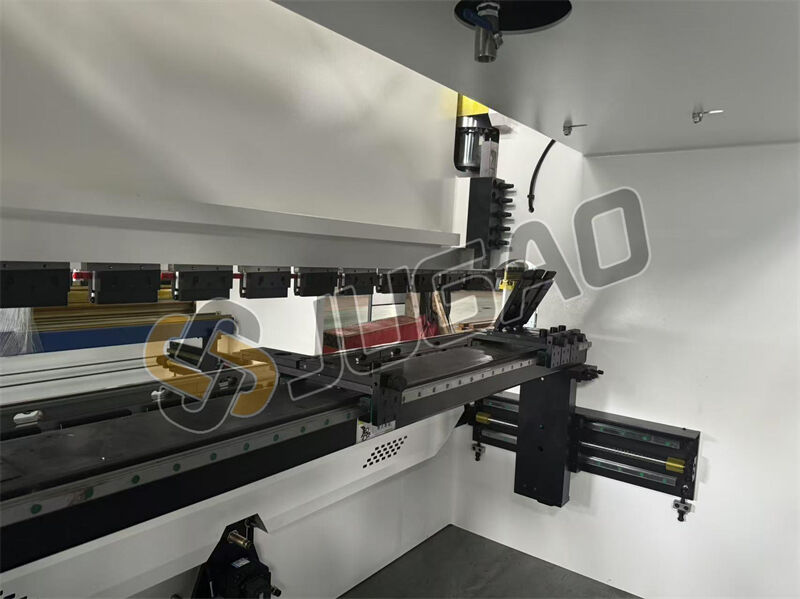
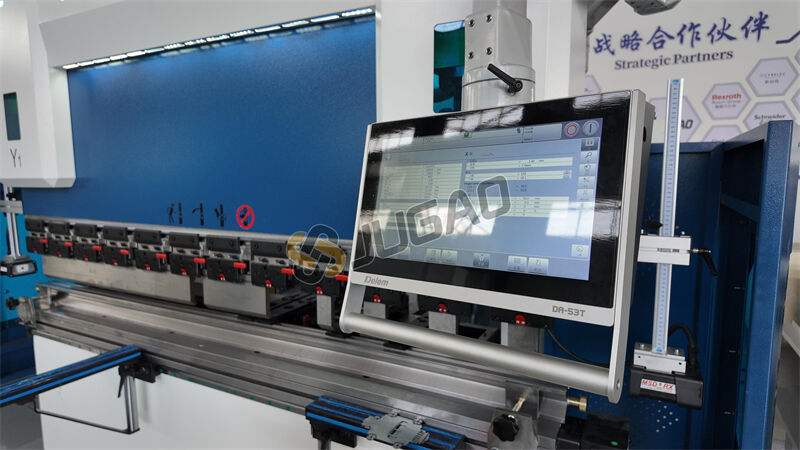
Step 4: Machine Parameter Setup
1. Set the backgauge position according to workpiece specifications.
2. Install the correct tooling and adjust the angle.
3. Ensure the material clamp is secure with no play.
Note: Tooling angle and backgauge distance must match technical drawings precisely.

Step 5: Test Bending
Perform a test bend with sample material:
1. Execute a standard 90° bend.
2. Measure the actual angle with a protractor.
3. Record deviations from the target angle.
This determines if further adjustments are needed.
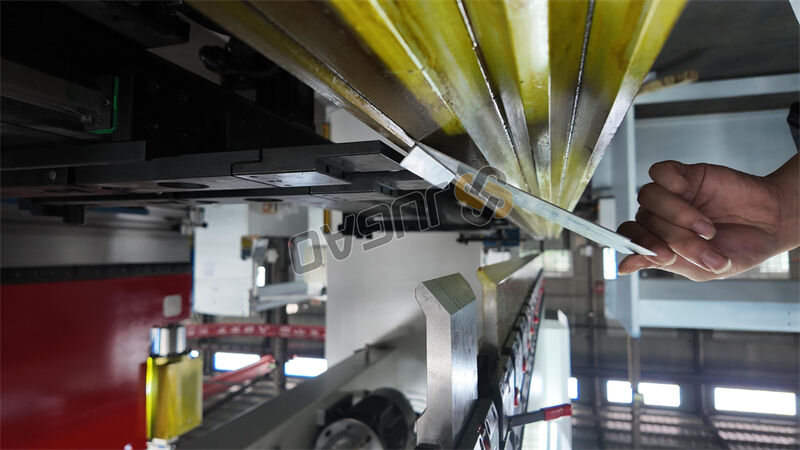
Step 6: Precision Adjustment
Make system adjustments based on test results:
a) Ram Parallelism Calibration
Place a straightedge on the bed and check alignment with the ram.
If deviation exceeds 0.02mm/m, compensate via the hydraulic system.
b) Bend Angle Correction
If angle error is >±0.5°, readjust tooling position and pressure settings.
c) Bed Deflection Compensation
Adjust hydraulic crowning cylinders based on material thickness to counteract bed flexing.
d) Backgauge Fine-Tuning
Use a digital caliper to set backgauge positioning accuracy to ±0.1mm.
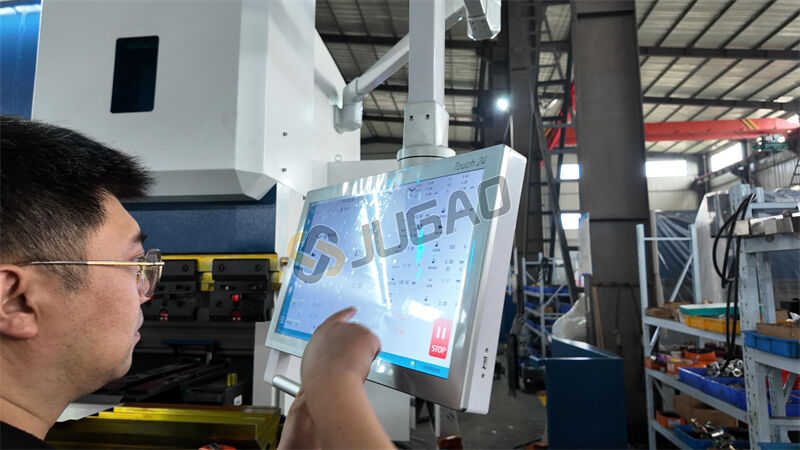
Step 7: Verification Test
After adjustments, repeat the test bend:
1. Use the same test material.
2. Re-bend under identical conditions.
3. Confirm angle tolerance ≤±0.5°.
If still out of spec, repeat adjustment steps.
Key Recommendations:
1. Calibrate every 500 operating hours or when changing tooling.
2. Increase calibration frequency for complex workpieces.
3. Maintain detailed calibration records.
4. For technical issues, contact JUGAO Technical Support immediately.
By following this calibration process, your press brake will maintain peak performance, delivering high-precision, reliable bending for all your fabrication needs.

