


Use ESA S860 Machine Functions for Perfect Bends
Achieving flawless and repeatable bends in metal fabrication relies heavily on a deep understanding of your equipment’s capabilities. For operators of the ESA S860 bending machine, harnessing its advanced functions is key to improving accuracy, reducing setup times, and ensuring consistent high-quality results.
This guide provides a detailed walkthrough of the ESA S860’s core functions, with clear instructions on how to activate and apply them. Whether you’re an experienced machinist or new to CNC bending, you’ll find actionable insights to optimize performance and achieve professional-grade outcomes in every project.
Understanding the “Metal-Working Machine” Function
The ESA S860 integrates specialized metal-working functions designed to streamline the bending process. Central features include:
Intuitive Soft Keyboard – Simplifies programming through a user-friendly interface.
New Bend Function – Enables quick creation and storage of bending programs.
Bend Clinching Function – Locks bends securely for enhanced precision and repeatability.
Together, these tools minimize manual input, accelerate production, and improve overall bending accuracy—making the ESA S860 a vital asset in modern sheet metal workshops.
Activating Metal-Working Mode
To enable the Metal-Working Machine function on your ESA S860:
1. Open the Settings Menu from the home screen.
2. Choose Configure (2) to access system settings.
3. Select General Parameters (7) and press Next.
4. Enter your security password and confirm with OK.
5. Set the Metal-Working Machine option to 1 and press ENTER (applicable for S860 Touch and S660W models).
Once activated, the following capabilities become available:
New Bend Programming – Quickly replicate existing bend data.
Forced Bend Clinching – Ensures precise bend completion.
Using the New Bend Feature:
Press the ▶ key on the final bend of a section to duplicate it below.
Select Enter Step from the menu to insert a bend with the same parameters at the current position.
Using Forced Bend Clinching:
Within Settings and Bend Summary, enter 0 in the Y1 Angle Field to mark a bend for clinching. This provides exact control over the bending endpoint, ideal for complex multi-stage forming.
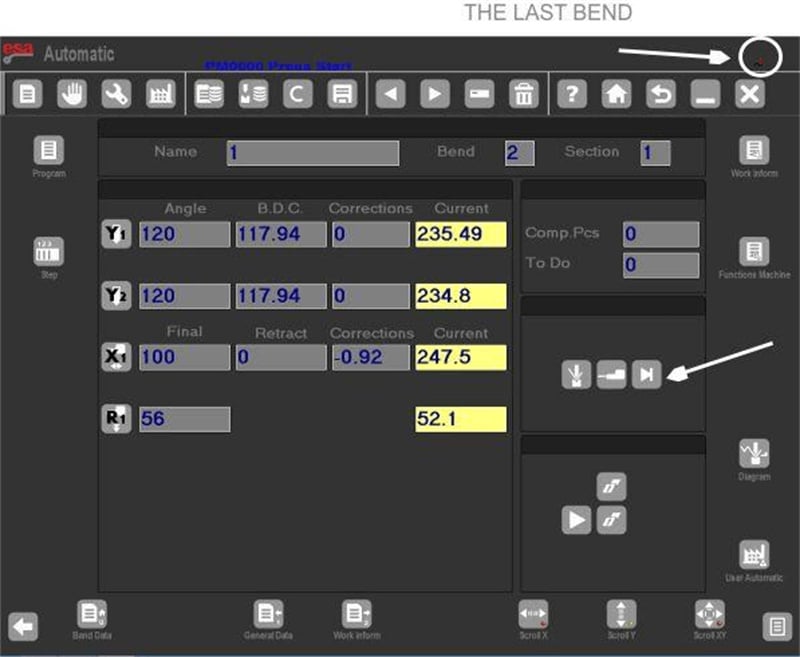
Last Bend Indicator
An icon displayed in the upper-right corner of the screen signals the Last Bend in your programmed sequence. This visual cue helps prevent unintended additional bends when operating the machine controls.
“Machine Functions” Configuration Panel
Tailor bending operations to specific needs through the Machine Functions menu. Access it by pressing the corresponding key from the data settings screen,selecting option 7.
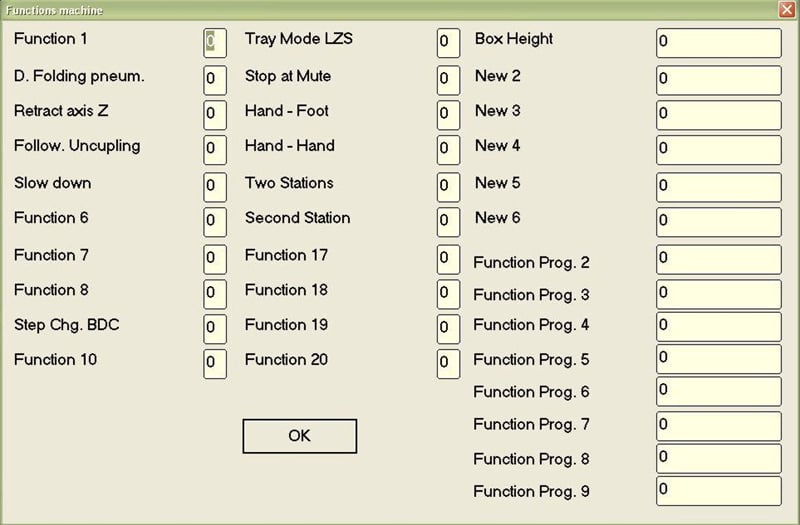
Available functions include:
Pneumatic Squash Function – Raises the pneumatic squash die when set to 1 in a stop-included bend.
Z Axes Recoil – Triggers recoil movement in Z1/Z2 axes based on the “Deviation value of Z” parameter.
Accompaniment Unhooking – Allows the guiding accompaniment to detach during its cycle when enabled.
Slow Descent Function – Maintains slow ram descent in Semi-Automatic and Automatic cycles.
Pitch Change to PMI – Delays pitch adjustment until the ram reaches the lower dead point.
LZS Tray Mode – Exclusive to the ‘laser safe’ safety system (parameter = 1).
End of Height Function – Specifies fin height (in mm) for LZS Tray Mode applications.
Stop at Mute / Hands-Feet / Hands-Hands / Double Pedal Functions – Safety and control options within the ‘laser safe’ system for pausing, restarting, and pedal-based operation.
Managing Program Versions
From software version 10.1 onward, the ESA S860 supports up to 20 programmable functions. While newer versions can read older program files, they are not backward-compatible. However, you can export programs in legacy formats (compatible with versions 5.0–9.1).
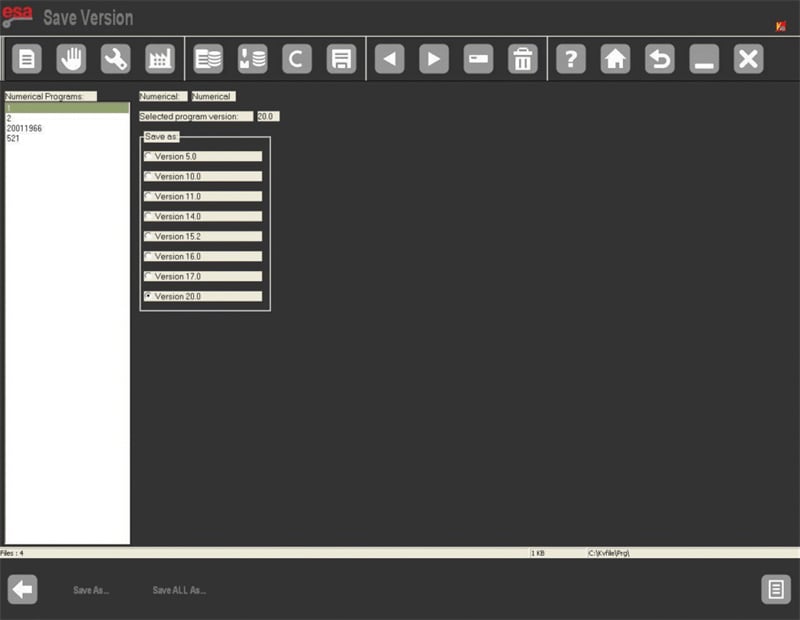
Saving a Single Program in a Previous Version:
1. Open the program list.
2. Press Save Version to enter the conversion screen.
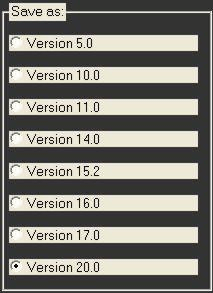
3. Choose the program and target format (e.g., Version 20.0).
4. Press ENTER, then Save As....
5. Name the file, select Confirm, and press ENTER.
Saving All Programs in a Previous Version:
1. From the program list, select Save Version.
2. Pick the desired legacy format.
3. Insert a formatted USB drive with sufficient space.
4. Press Save All As... to export all programs.
The “Tools” Configuration Screen
The Tools menu (option 9 from the data settings screen) is essential for managing workstations and automating Z-axis calculations.
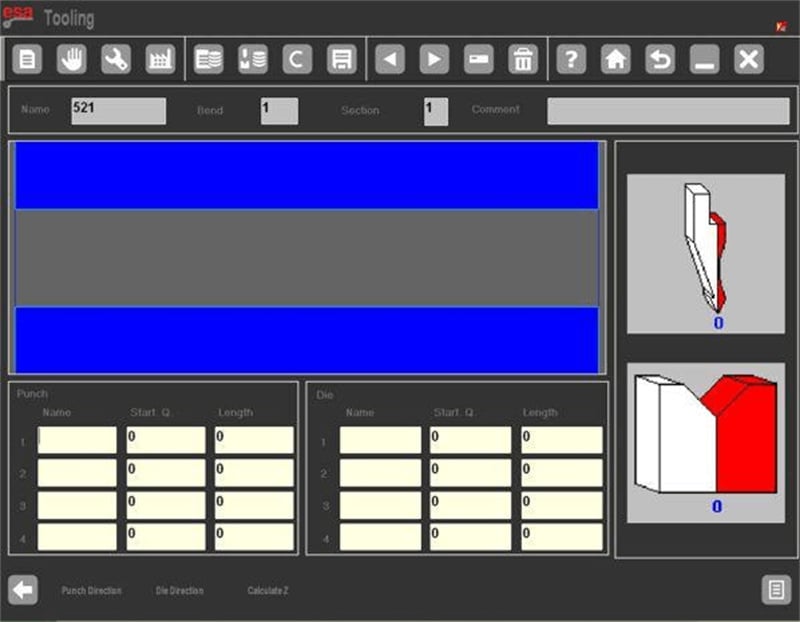
The interface displays:
A frontal diagram of the machine with tool “teeth” icons.
Side panels illustrating tool orientation.
Data fields for up to four workstations, including:
Station number (1–4)
Assigned punch and die names
Tool measurements (from point 0 or internal shoulder)
Tool lengths per station
This setup ensures accurate tool alignment and simplifies multi-station programming.
Additional Menu Options
Expand your control over the ESA S860 through these auxiliary menus:
1. Turning Off the NC – Select Turn Off (5) to safely power down the system.
2. Software Version – Choose Version (7) to view software details, active axes, and installed options.
3. Logo Display – Access Logo (8) to show the default Esautomotion logo or upload a custom company logo.
4. Memory Monitor – Use Memory Monitor (9) to track system memory and optimize workflow efficiency.:
How can I troubleshoot issues with ESA S860 Machine Functions?
If you encounter issues with ESA S860 Machine Functions, first refer to the troubleshooting section of the manual. Common fixes include recalibrating the controls, checking electrical connections, and verifying software updates. If problems persist, contact customer support.
Conclusion
Proficiency with the ESA S860’s machine functions comes from hands-on experience and a solid grasp of its operational features. By applying the guidance provided above, you can execute precise, repeatable bends with greater confidence and control.
Consistent machine setup, routine maintenance, and adherence to recommended practices are fundamental to sustaining high performance and minimizing downtime in your bending operations.
Should you require further support or wish to explore the full potential of your ESA S860, our technical team is ready to assist. Visit our website for additional tutorials, documentation, and resources to help you master advanced bending techniques.

